


Installation of iPhone 3GS Battery

Send this link via e-mail
|
Tweet |
|
Step 2
Remove the metal handle from the suction cup. Instead of the metal base you should grip the suction cup base, since it is much safer that way.
Be careful not to damage the cables under the display of the iPhone when opening the device.
You will find a rubber gasket between the silver front rim and black display assembly. To separate the iPhone's display assembly, it is required to use a bit of a force. We suggest you to move a suction cup back and forth in order to do so.
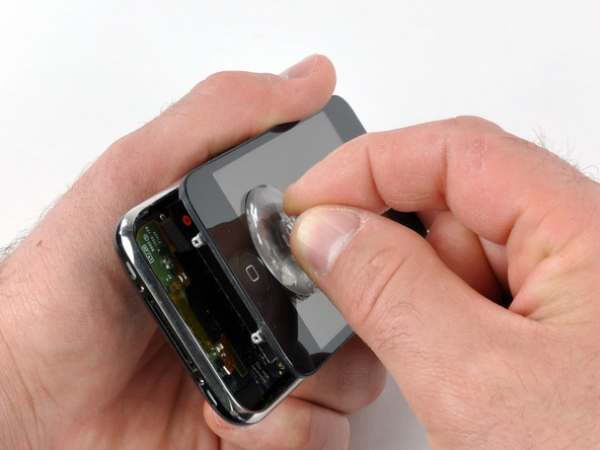
Near the Home button, there is a small suction cup. You should use it to pull up the bottom of the iPhone display.
In case of damaged display assembly, it is advised to use an adhesive (tape) to fix it and therefore allow the suction cup to adhere.
Step 3
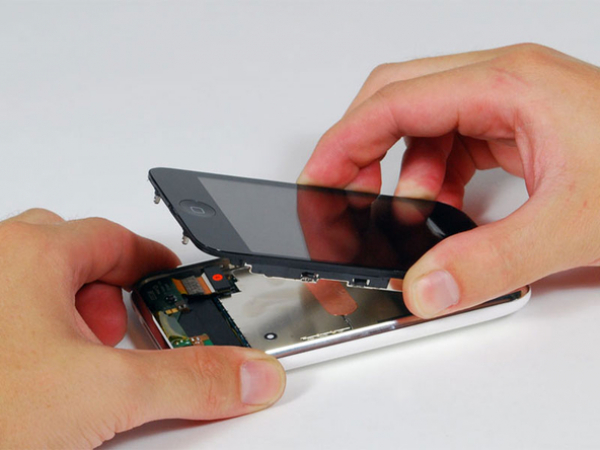
Do not try to remove the display assembly yet since it is connected to the device by some cables.
You should set the display assembly at an angle of approximately 45 degrees, by rotating it carefully.
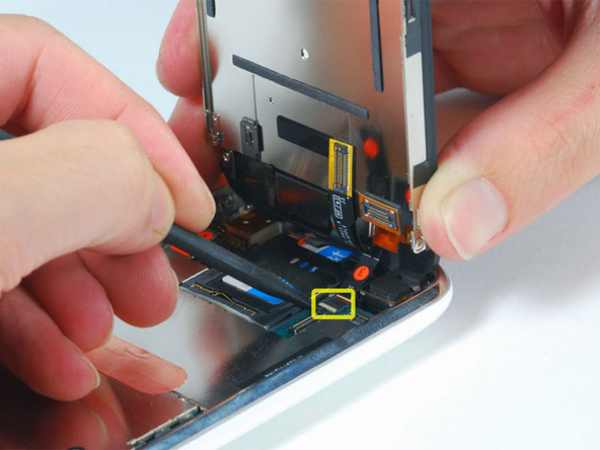
Step 4
With one hand hold the display assembly and take the spudger tool in another hand in order to disconnect the black ribbon cable marked as cable "1".
As seen in the picture, the spudger should be inserted under the ribbon, carefully from the left. Doing so from the right could damage the ribbon connector and then you will have to replace the entire display!
All connectors are removed upwards, except the ribbon connector. (Step 6)

Step 5
Set the display assembly vertically. This way you will have free and easy access for disconnecting the cables left.
To disconnect the black ribbon cable marked "2" (for capacitive touch panel), you should use the spudger tool as well.
Step 6
Pay attention: In case you have Chinese or European 3G version, you might notice the lack of the flip up plastic tab. All you need to do is to slide the ribbon cable towards the screen until you remove it. After this procedure, you should press the ribbon to insert it back into the "socket."
Note that some iPhones may have the connectors of reversed colours for connector marked "3"e.g. White connector/ black plastic tab. Be careful while flipping up the tab. If you do not do it properly, the connector might be damaged.
To flip up the tab that holds the cable "3", you should use the spudger. The tab will rotate up 90 degrees and the ribbon cable will be released.
You need to slide the black ribbon cable from the connector and then finally remove the display assembly from the device.
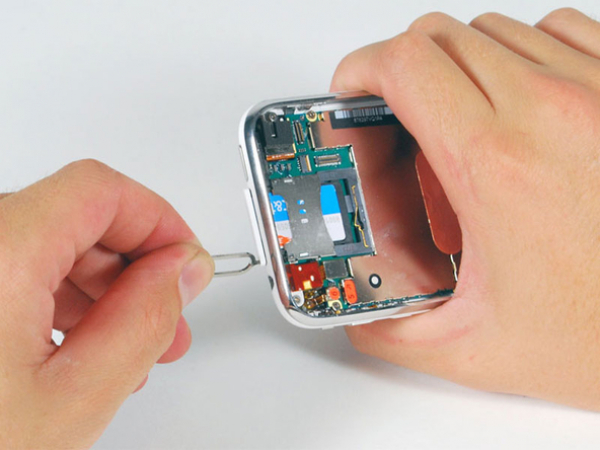
Step 7
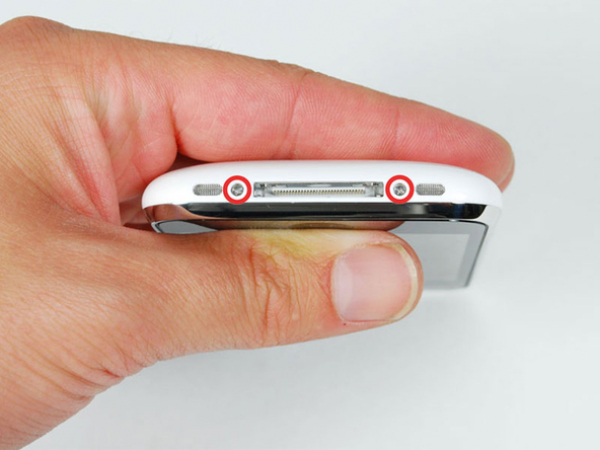
Next to the headphone jack you need to insert the SIM eject tool.
Press it down until the SIM card tray is ejected.
Take the SIM card tray and slide it out.
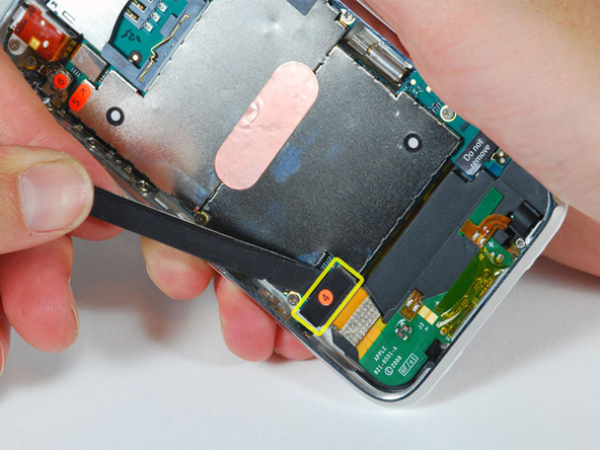


Step 10
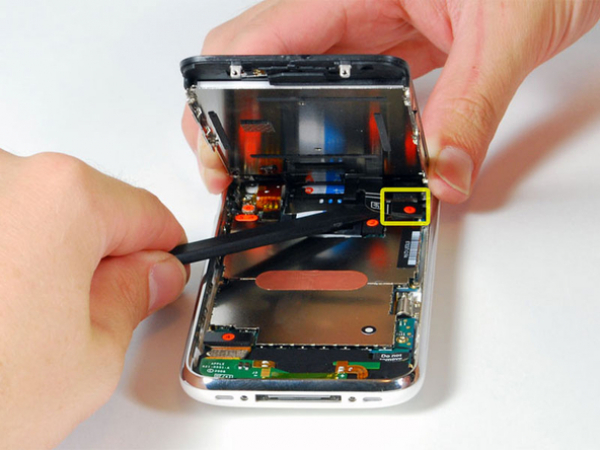
To disconnect the ribbon cable marked "6", you should use the spudger tool as well.
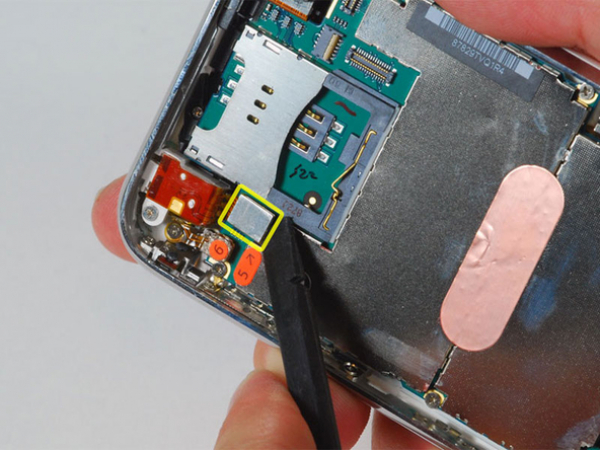
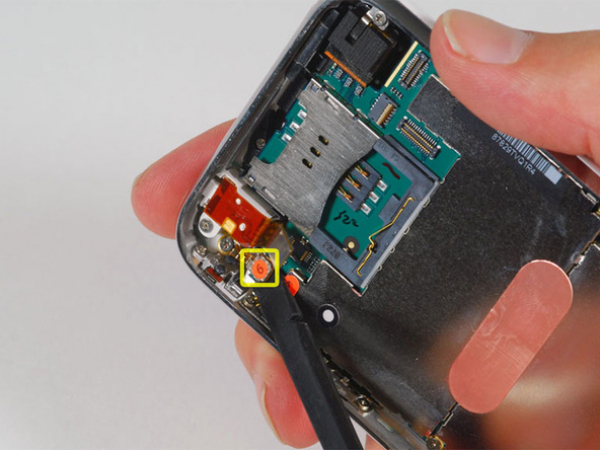
As seen in the second picture, use a spudger to disconnect the ribbon cable marked "7."
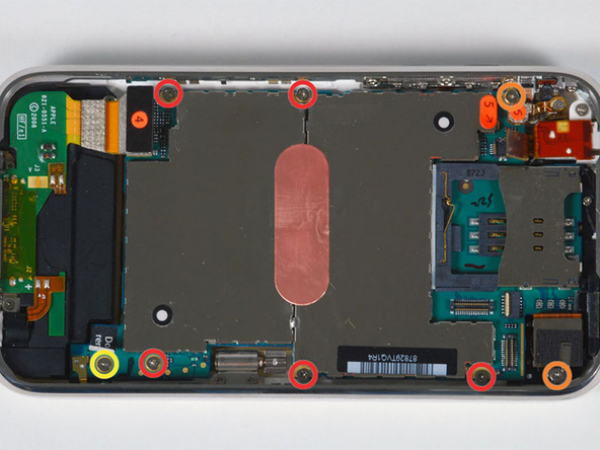
Step 12
In this step, 8 following screws should be removed:
2.3 mm Phillips #00 screws - 5 pieces (with partial threads securing the logic board to the rear case)
2.3 mm Phillips #00 screws - 2 pieces (with full threads securing the logic board and camera)
2.9 mm Phillips #00 screw - 1 piece (under the "Do not remove" sticker).
Reassemble Note:
The screw next to the camera (bottom right orange screw) secures the camera with a metal strip.
You need to remember to put this strip back in place before inserting the 2.3 mm Phillips #00 screws next to the camera.
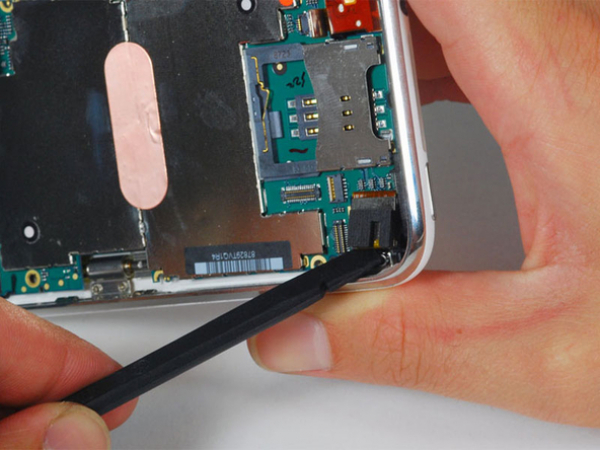
Step 13
Gently lever the camera up and out of its housing in the back case, using the spudger tool.
Note that the camera cannot be entirely removed due to the connection with the bottom of the logic board.
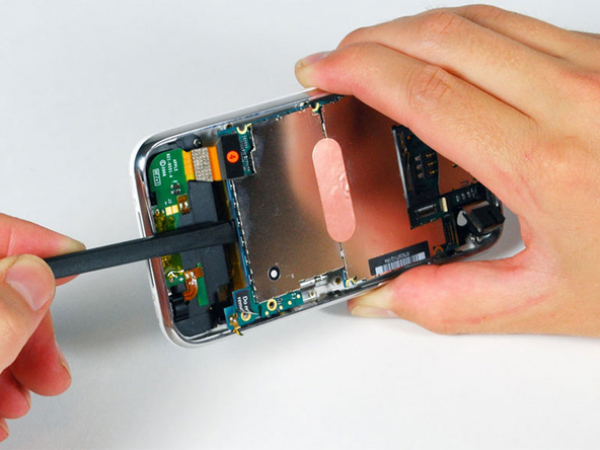
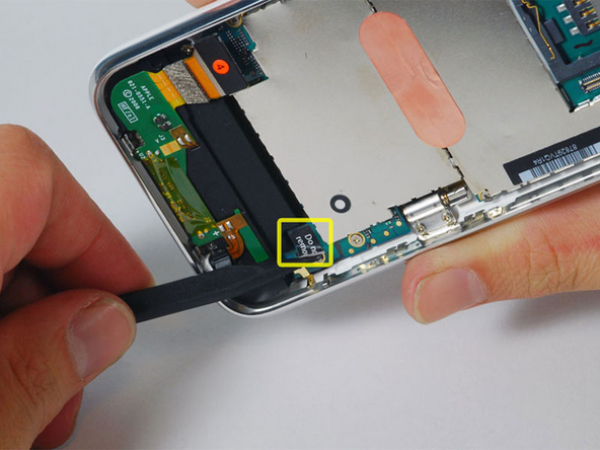
Step 14
Gently lever the end of the logic board next to the dock-connector, also using the spudger.
Next to the "Do not remove" sticker there is a small golden tab on logic board. When levering up the logic board, PAY ATTENTION this does not hook on the side of the case because it might break easily. If you experience any signal problems after removing the board, check this ground tab again.
In case the board won't lift up, you should check to make sure that all the screws securing the logic board have been removed properly.
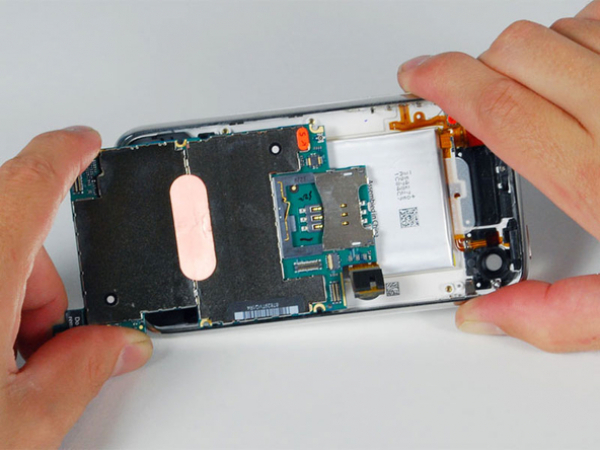
Step 15
Now you have to slide the logic board towards the dock connector and then out of the iPhone.
When replacing the logic board after you have installed the battery, make sure to connect the camera to the logic board before inserting it into the case. After that you need to set the upper section of the logic board (with the SIM tray) in place before doing the same thing with the rest of the board. Please, note this step, for SIM slot will not align in the place in some cases. Once the upper section is in its place, you should do the same with the bottom section as well. Only when the SIM tray is aligned with the opening in the case of the iPhone and the camera module is neatly placed, you will know the logic board is installed correctly.
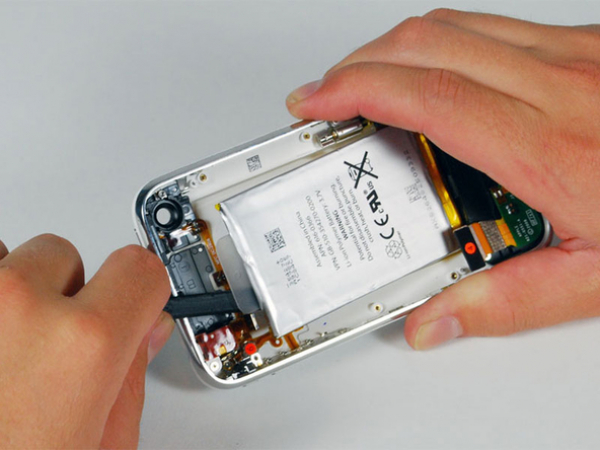
Step 16
Lever up the battery from the rear case using the spudger tool. You will note the battery is fixed with an adhesive tape around the battery perimeter. It is suggested to use the plastic pull-tab in order to prevent the battery from bending during the removal process. Please note that in GPS antenna replacement DOES NOT require the battery removal. This way you will have more space for removing the headphone assembly (needless to remove entirely as well).
The iPhone's battery is fixed to the rear case with an adhesive. If your battery already includes an adhesive, everything is set for you. If your replacement battery doesn't have an adhesive backing, you will have to move the adhesive from your old battery to the new one.
To heat the back of the case you can use a hair-dryer at the lowest mode to heat the back of the case. This way you loosen the adhesive bond before separating the battery from the case with the spudger tool.