


iPhone 5 Battery Replacement

Send this link via e-mail
|
Tweet |
|
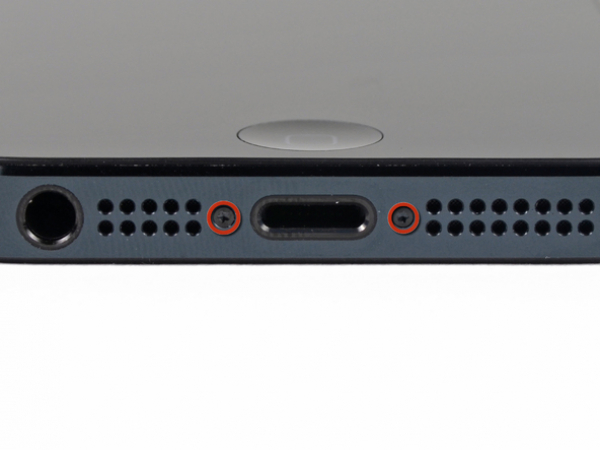
Step 1 - Front Panel Assembly
Make sure that your iPhone is turned off before you disassemble it.
Now remove two 3.6 mm Pentalobe screws next to the Lightning connector.
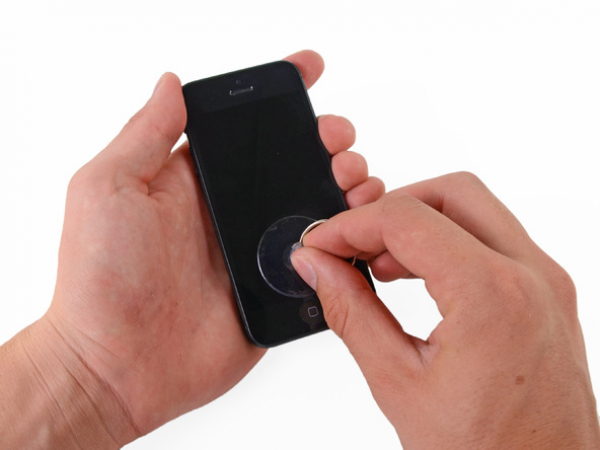
Step 2
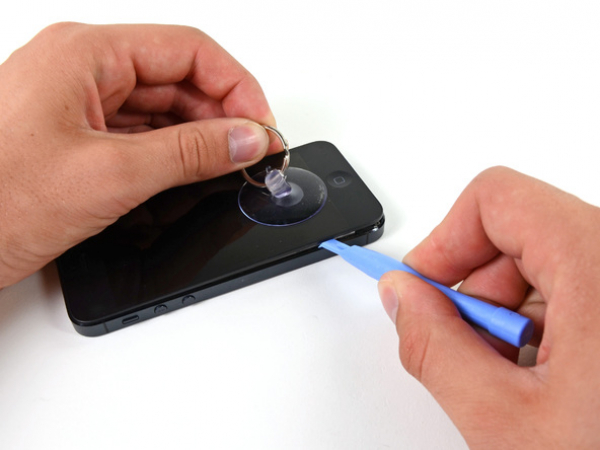
When you press a suction cup onto the screen, make sure to press it just above the home button.
Cup should be placed completely on the screen, in order to get a tight seal.
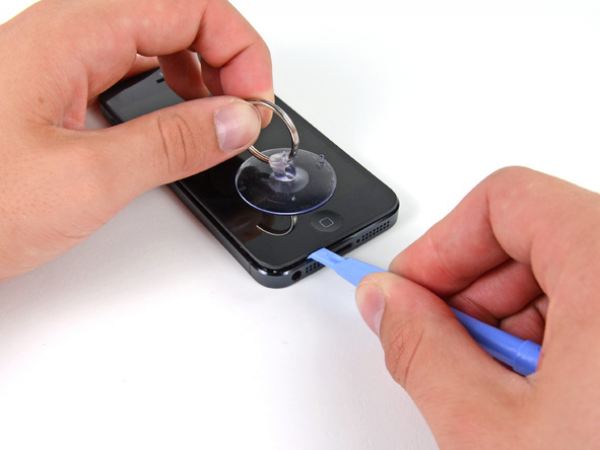
Step 3
Check if the suction cup is firmly attached to the front panel assembly.
Hold your iPhone down with one hand and simultaneously pull up on the suction cup to slightly separate the front panel assembly from the rear case.
Be very careful, do it gently but apply firm, constant force. The display assembly is a much tighter fit than it may seem.
While you pull up with the suction cup, use plastic opening tool to gently pry the rear case down, away from the display assembly.
Front panel assembly is attached to the rear case with several clips, so bear in mind that you will probably have to use a combination of the suction cup and plastic opening tool in order to completely free the front panel assembly.
Step 4
Slowly detach the clips along the left and right side by gently prying up around the sides of the front panel assembly.
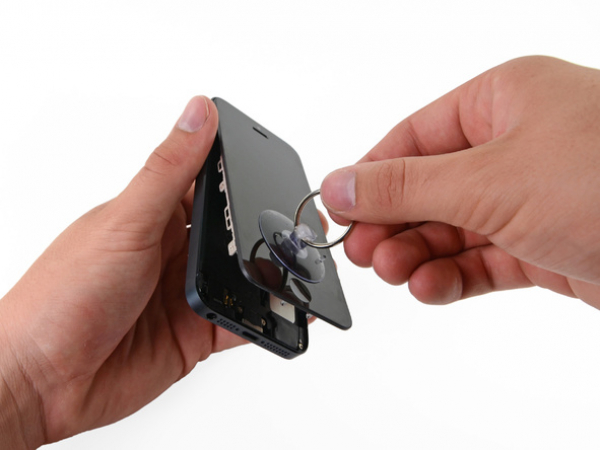


Step 5
Pull the bottom of the assembly away from the rear case once you notice that the clips have been released on the bottom and sides of the front panel assembly.
However, there are several ribbon cables still attached at the top of the iPhone, so be very careful not to completely remove the front panel assembly from the rear case.
Lift and rotate the front panel assembly up to about 90 degrees from the rear case.
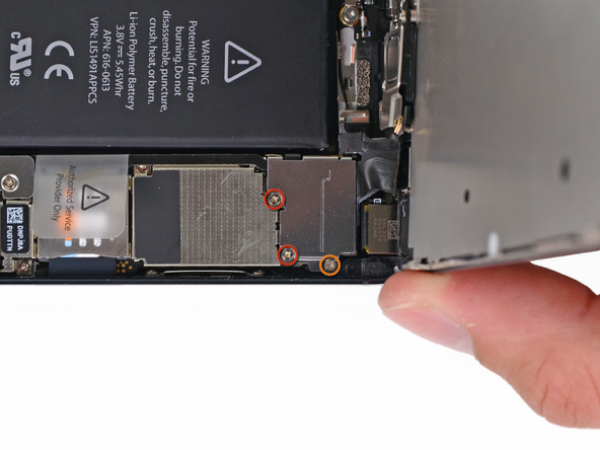
Step 6
The screws securing the front panel assembly cable bracket to the logic board need to be removed now:
Two 1.2 mm Phillips screws
One 1.6 mm Phillips screw
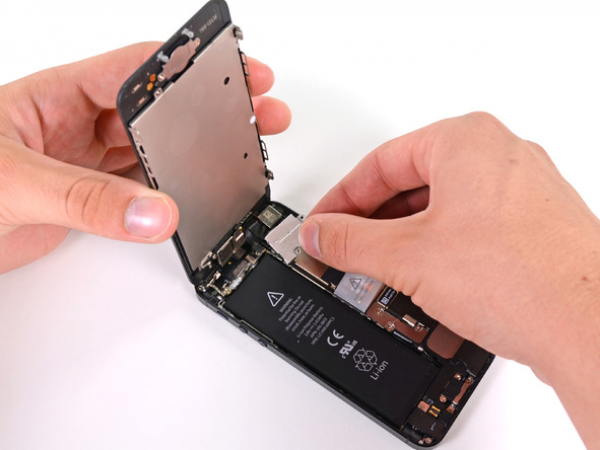


Step 8
Disconnect the three front panel assembly cables using a plastic opening tool:
Front-facing camera and sensor cable
Digitizer cable
LCD cable
The LCD cable may pop off the connector during the reassemble of your phone. This can result in white lines or nothing at all to appear when you turn the phone on. If something like this occurs, all you need to do is reconnect the cable and power-cycle your phone. You can do this simply by disconnecting and reconnecting the battery.
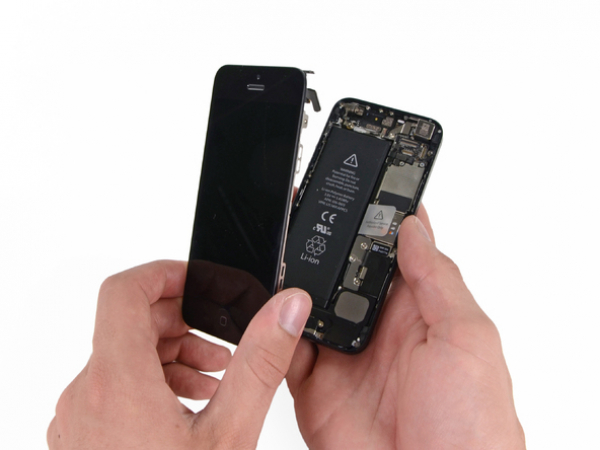
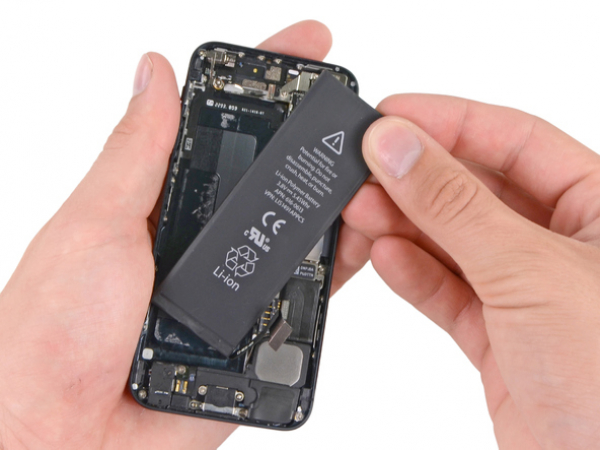
Step 10 - Battery
Back to top
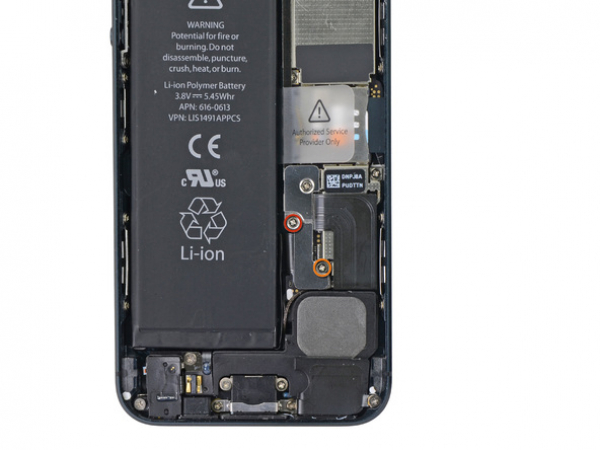
You should remove two screws that are securing the metal battery connector bracket on the logic board:
1.8 mm Phillips screw (1 piece)
1.6 mm Phillips screw (1 piece)


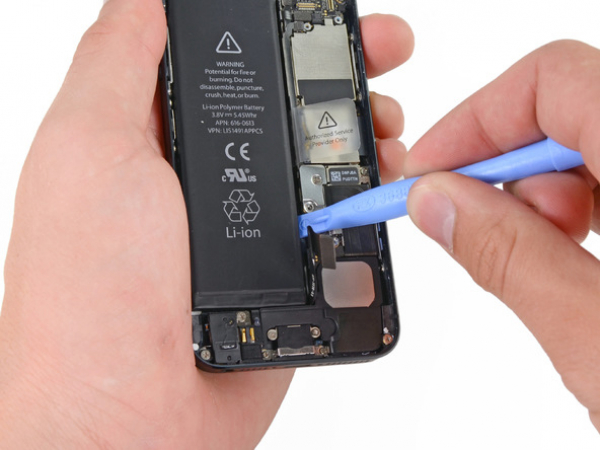
Step 12
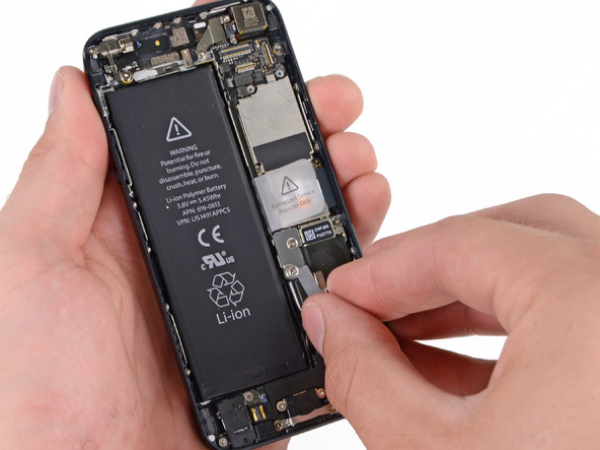
To lever the battery connector from the logic board socket you should use a plastic opening tool.
Pay attention to lever the battery connector only, not the logic board socket. If you accidentally do so, the entire connector might be ruined.


Step 13
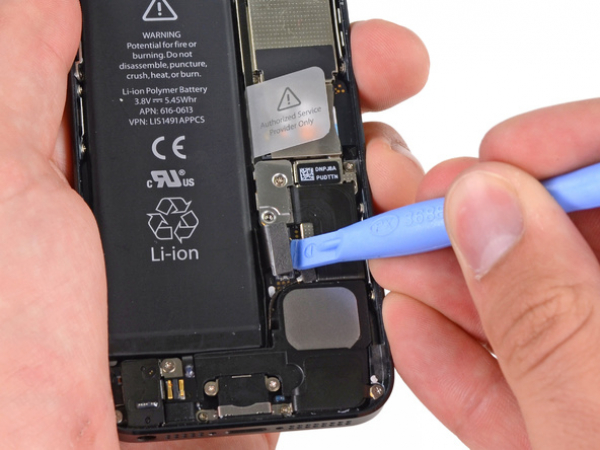
Put the edge of the opening tool between the battery and the back case near the bottom the device.
Move the opening tool along the right edge of the battery and lever it at several points in order to separate it completely from the adhesive that is connecting it with the case.
Try not to lever it too hard, since this may deform or damage the battery completely.