


iPhone 6 Front Panel Assembly Replacement

Send this link via e-mail
|
Tweet |
|
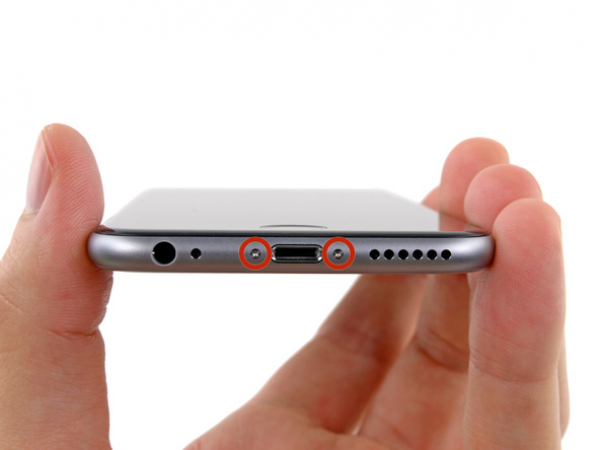
Step 1 - Pentalobe Screws
Before you disassemble your iPhone, make sure to turn it off.
There are two 3.6 mm Pentalobe screws next to the Lightning connector. You need to remove them.
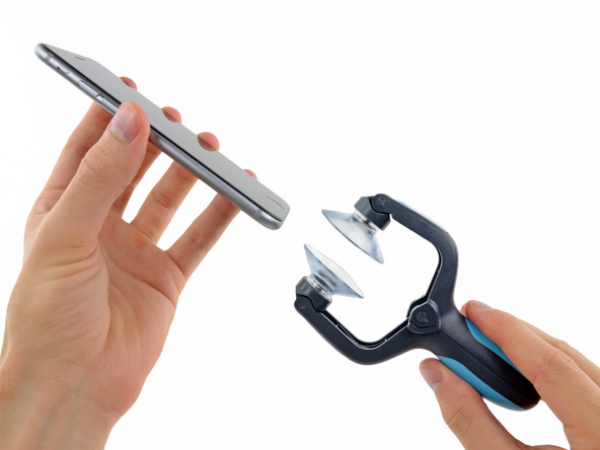
Step 2 - ISclack Opening Procedure
Back to top
In the next three steps, we will show you how to use the iSclack, a tool for opening the iPhone 6. If you are not planning to use the iSclack, move on to Step 5.
If there is a plastic depth gauge attached at the centre of the iSclack, you are free to remove it. You don't need to use it for larger phone, such as the iPhone 6.
Open the suction-cup jaws of the iSclack by closing its handle.
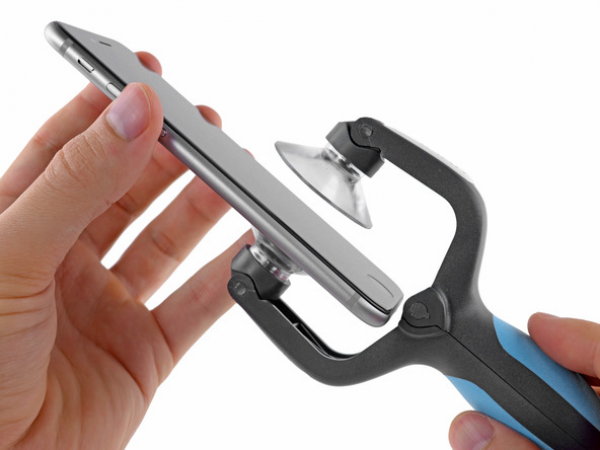


Step 3
Put the bottom of your phone in between the suction cups.
Make sure that the iSclack's upper suction cup is pressed against the display, just above the home button (but not covering it).
Close the cups of the iSclack by opening the handles. Centre them and press them onto the top and the bottom of the iPhone.
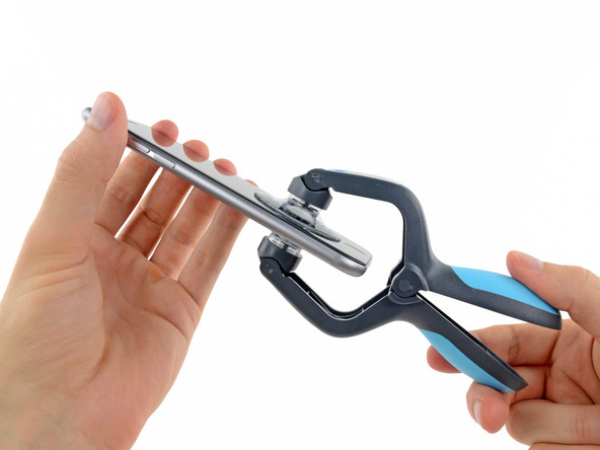


Step 4
Hold your iPhone securely while you close the handle of the iSclack and open the suction cups. This will separate the front panel from the rear case.
The iSclack will safely separate the pieces of your iPhone, but it will not damage the display cables.
Remove the suctions cups from your iPhone.
Skip the following three steps, and move on to Step 8.
Step 5 - Front Panel Assembly
Back to top
In case you don't have iSclack or you don't want to use it, you can use a single suction cup to remove the front panel from the rest of your iPhone.
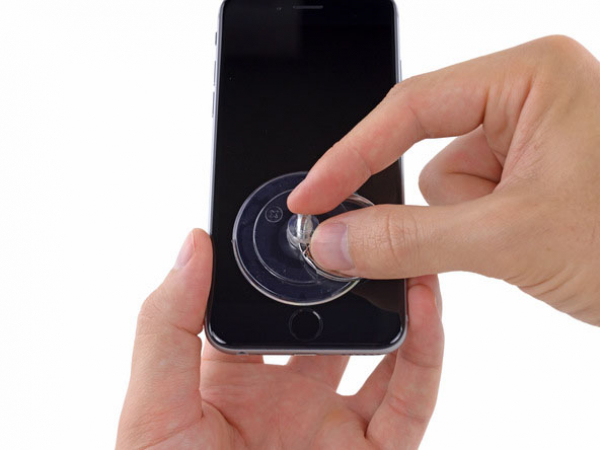
Put the suction cup on the screen just above the home button, and press on it.
Make sure that the cup is pressed securely on the screen.

Step 6
Hold your iPhone down with one hand, and pull up on the suction cup with your other one. This will separate the front panel from the rear case.
Apply firm force while pulling up the front panel from the rest of the phone. Take your time.
Using a plastic opening tool, start prying the rear case down and away from the display assembly. Continue pulling up with the suction cup while you are doing this.
Several clips are holding the front panel assembly to the rear case - in order to free the assembly, you might need to use both the suction cup and a plastic opening tool.


Step 7
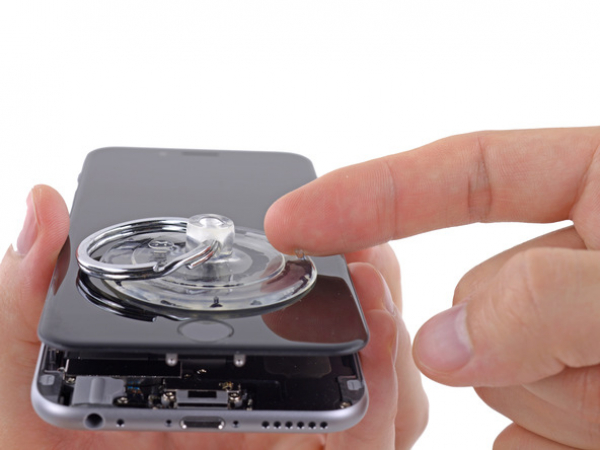
Release the vacuum seal on the suction cup by pulling on the plastic nub.
Separate the suction cup from the display assembly.


Step 8
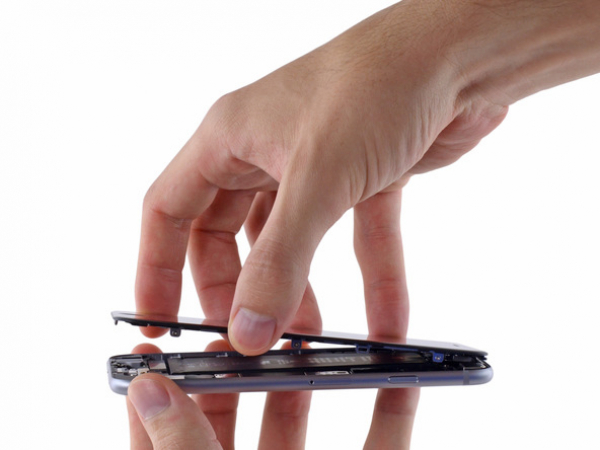
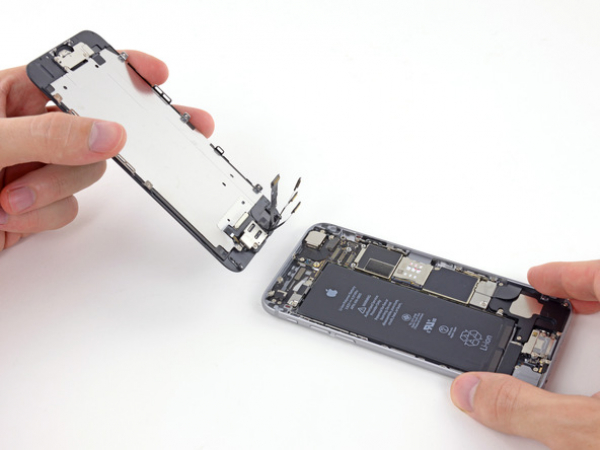
Pull the front panel assembly (the home button end of it) away from the rear case. Use the top of the iPhone as a hinge.
You should keep the front panel supported at a 90º angle in relation to the rear case. Make sure it stays this way until you remove it. If you allow the front panel to fall flat, you will strain the display cables, including their connections on the logic board.


Step 9
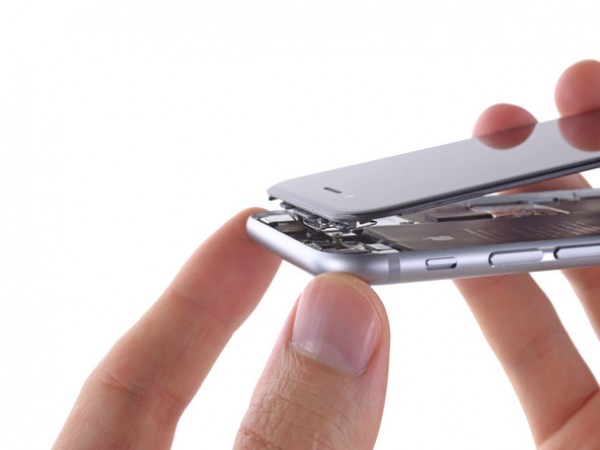
Several clips located at the top edge of the front panel form a partial hinge, which allows the front panel assembly to open like a book.
When you start to reassemble your iPhone, align those clips just beneath the top edge of the rear case. Slide the front panel upward until its top edge is pressed against the top edge of the rear case.
Step 10
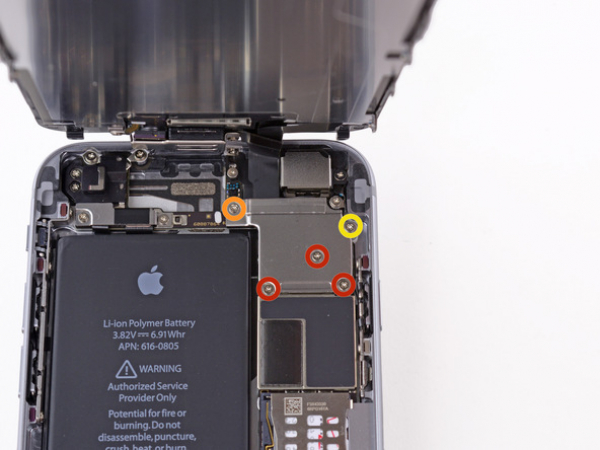
Five Phillips #00 screws are securing the front panel assembly cable bracket. You need to remove them.
Three 1.2mm screws
One 1.7mm screw
One 3.1mm screw
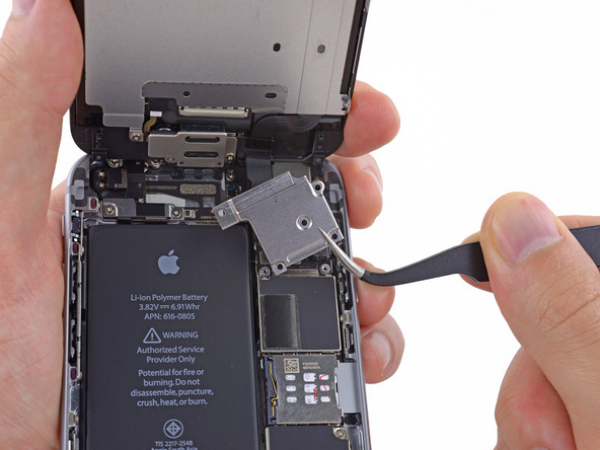


Step 12
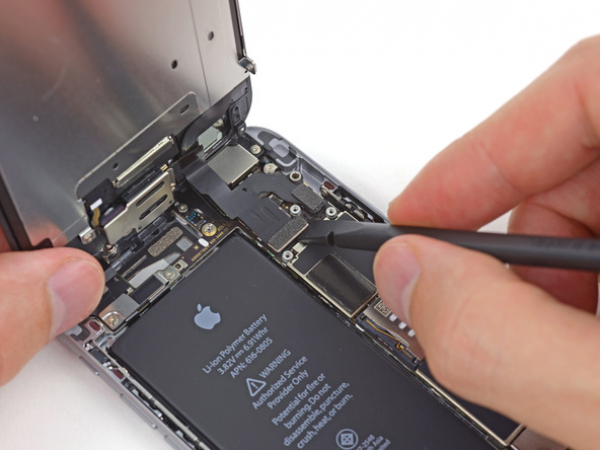
In the following four steps, make sure to pry up only on the cable connectors, and not their sockets on the logic board.
Disconnect the front-facing camera and sensor cable connector using the flat end of a spudger.


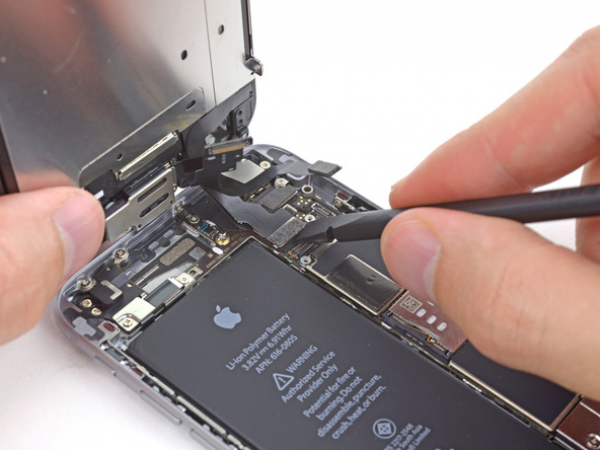


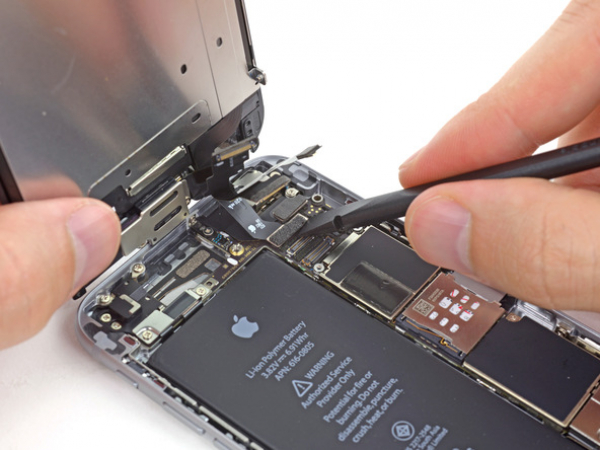


Step 15
Disconnect the display data cable connector using the flat end of a spudger.
When you start reassembling your phone, the display data cable might pop off its connector. If this happens, you will see a blank screen or white lines on it when power your phone back on. To solve this issue, you'll need to reconnect the cable, and power cycle your phone. The best way to do this is to disconnect and reconnect the battery connector.
Learn how to remove your iPhone's front panel assembly.