


iPod Touch 4G Front Panel Replacement

Send this link via e-mail
|
Tweet |
|
Step 1 - Front Panel
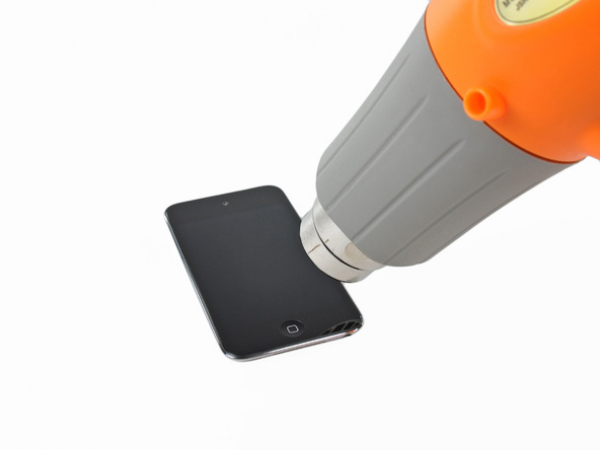
The iPod Touch 4th Generation front panel is attached to the rear case by adhesive. It is highly recommended to use a heat gun in order to soften the adhesive.
Set the heat gun on "low" mode and begin heating the lower portion of the iPod Touch near the home button.
It is suggested to use the heat gun in circular motion pattern to evenly disperse the amount of heat throughout the device.


Step 2
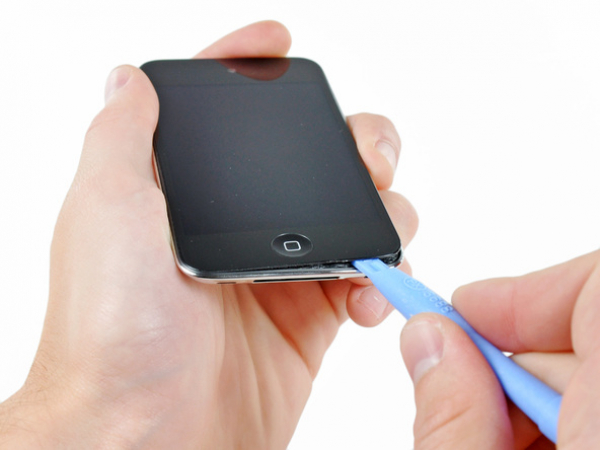
After the heating, the iPod Touch will be very hot. You might want to hold it with a towel while prying.
Insert the iPod opening tool between the front glass panel and the black plastic bezel near the home button.
Try not to pry between the black plastic bezel and the steel back case.
Pry the bottom edge of the front panel upward. Be very careful while doing so as not to bend the glass excessively.
If you find it too difficult to pry it up, reheat it with the heat gun and try again.
Step 3
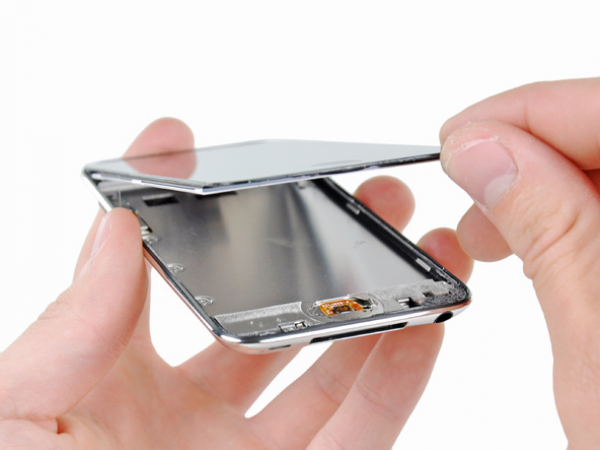
If there is enough room to grab the bottom edge of the panel, lift it away from the body of the iPod Touch so you could remove the adhesive along its left and right edges.
If it is still difficult for you to separate the adhesive, we suggest you to use the heat gun once again before moving on to the next step.


Step 4
The digitizer cable cannot be disconnected until you remove the logic board, due to the construction of iPod Touch. Be extremely cautious when handling the front panel assembly, since it is attached to the rest of the iPod Touch by the very fragile digitizer cable.
The display data cable is also very short and fragile. It is connected to the logic board near the top of the front panel assembly. If you do not disconnect it while removing the top edge of the front panel assembly, make sure to use the iPod opening tool to disconnect it before rotating the front panel assembly out of the Touch.
Be very careful when pulling the top of the front panel assembly away from the adhesive that is holding it to the iPod Touch. Pay attention not to damage the short digitizer cable that is connecting the two components.
Step 5
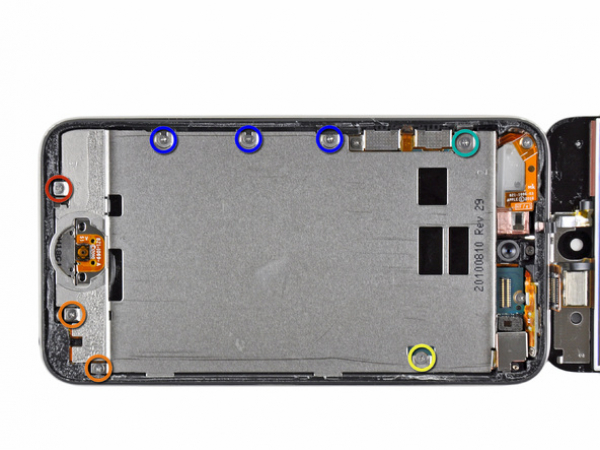
Remove the following Phillips #00 screws (eight pieces):
One 3.5 mm Phillips screw
Two 3.0 mm Phillips screws
One 2.3 mm Phillips screw
One 2.4 mm Phillips screw
Three 2.0 mm Phillips screws
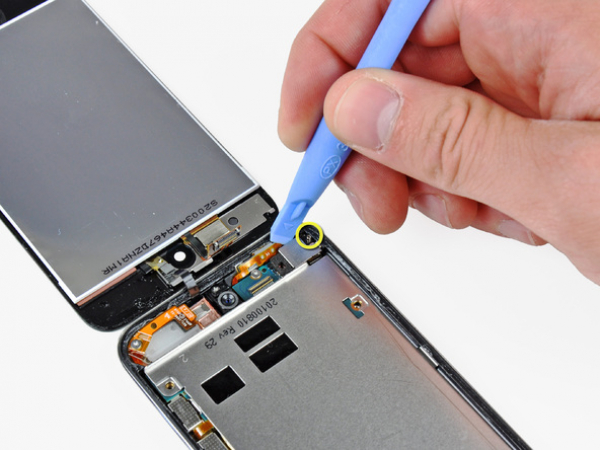
Step 6
Pry the thin steel cover up from the back facing camera by using the edge of the iPod opening tool.
There is a small spring located near the bezel next to the camera (marked in yellow).
Remove the steel cover from the iPod Touch.
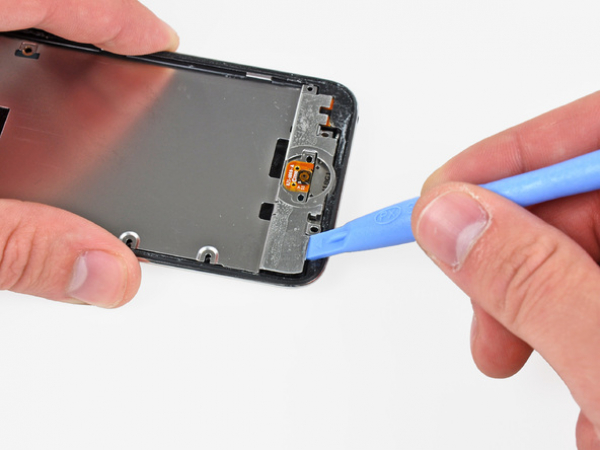


Step 7
Insert the edge of the iPod opening tool under the steel mid plane near the left corner at the bottom of the iPod Touch.
To separate the plate from the adhesive securing it to the plastic inner case, pry the opening tool upward.
If the plate is still attached to the logic board, you will probably have to reheat that area to soften the adhesive. Use the opening tool to separate the plate from the logic board.
Be extremely careful! The speaker is under the area displayed in the photo. It is connected with very fragile and short wires.
A very thin ribbon cable is connecting the volume and power buttons to the logic board. Be very cautious while working around this area (see the picture), so as not to rip this extremely fragile cable.
If you are not careful, the cable will tear easily.
Note the adhesive under the area marked in red.
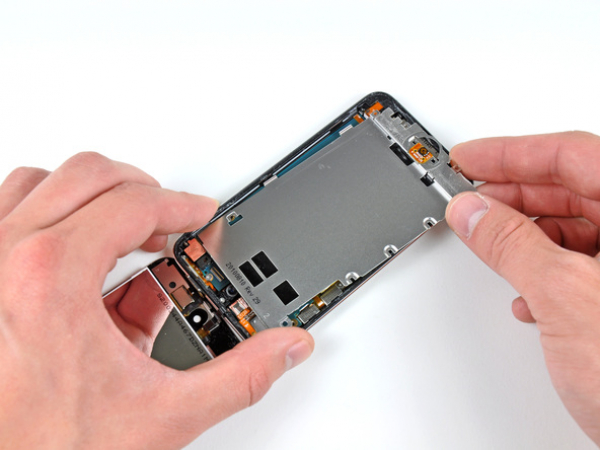


Step 8
Slightly tilt the steel mid plane to dislodge it from the back case.
Be careful not to tear the piece of copper tape that is connecting the back-facing camera to the steel mid plane.
Carefully lift the steel mid plane up off the back case and peel off the piece of copper tape stuck to the back-facing camera.